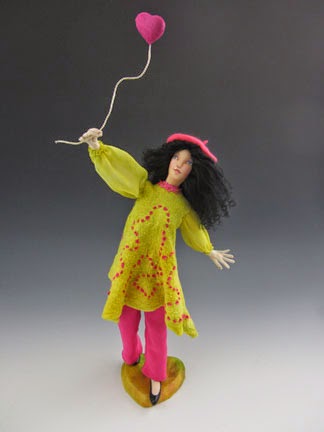
Here is a little pink beret I made for a doll recently.
To make the beret, start with merino wool. I can't really say how much, since I started with a 4 oz bundle and hardly made a dent in it. This beret is for a 19" doll. It doesn't take much at all.
The first thing to do is make the top knot. Pull off a ½” x 4” piece of wool.
Fold it over lengthwise on top of itself so
that it is now 2” long.
Roll it dry between
your palms,
then wet it with warm soapy water and roll it between your fingers
some more.
Be sure to leave the unfolded
end dry. This will attach later to the
top of the beret.
Lay this on top of
bubble wrap and roll some more.
Tease
out the dry end in a circle after rolling.
Cut a 4” circle from plastic resist and a ¾”-1” circle. In this case I used clear vinyl which is sold by the yard at my fabric store.
On the work surface, lay down a towel, then clear plastic sheet (e.g.
dry cleaner bag), and the 4” circle resist pattern.
Lay out one layer of wool vertically,
then another layer
horizontally,
and a third layer in a circle over the resist.
Cover with a piece of netting and wet with
soapy water.
Carefully remove the
netting and cover with clear plastic (dry cleaner bag). Flip the entire thing over, carefully remove the plastic bag
and fold the wet wool over the edge of the resist.
Now
lay out three layers again on top of this side, just as you did the first time. Cover with net, wet the wool, remove the net,
flip, and bring the wool over the edge again, smoothing as you go. Your resist is now completely encased inside
the wool.
Flip over and add your top knot by placing the dry teased out ends to the
middle of the wool beret, wet and gently press down.
Cover again with plastic bag. Press and pat all over the beret for a while,
then start gently skimming the surface in a circular motion with your
hands.
Flip the piece over and do the
same on the other side. Gradually add
pressure when you rub.
After rubbing
both sides for a while, place the beret on bubble wrap or a bamboo mat, roll it
up and roll back and forth 50 times.
Open the mat and give the beret a quarter turn, roll up and roll
again. Do this until you have gone all
the way around, then flip it over and do it again on the other side. At this point the wool has begun to shrink
and the resist inside is causing the beret to curl up a bit.
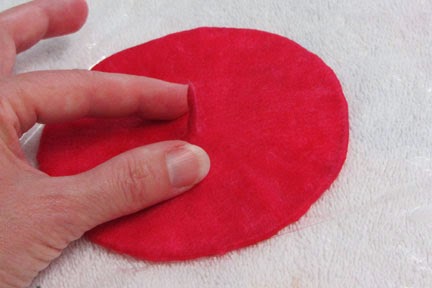
Cut the opening for the head by placing the smaller circle in
the center on top of the wool and cut through the top layer only to remove the
resist.
Add more soapy water and gently rub the inside with your
fingers. Rub around the opening. The opening gets larger as you work.
Shrink the beret by dipping it in very hot water and then
throwing it against the sink bottom a few times.
You can also shrink it
by working it on a washboard. This is
also helpful for finishing the opening seam.
Rinse the beret to get all the soap out, then place in a bowl
of cold water with a little bit of white vinegar added. Then squeeze out as much water as you can,
set aside and let dry.
And here it is on the completed doll.
"Chasing Dreams"